Google Sheets move row keyboard shortcut: what works
By Ninki Gen Studio · 6 min read
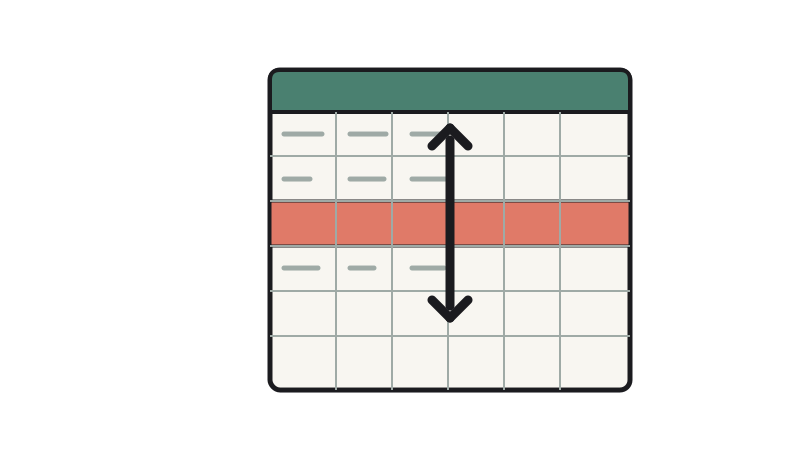
- Google Sheets has no single key combo for moving a row, but a short keyboard sequence does the job.
- Select the whole row first: press Shift + Space twice, then Alt + Shift + E, M, and K (up) or J (down).
- If the Move option is greyed out, you've only selected cells, not the entire row.
- Columns work the same way, starting with Ctrl + Space twice, then C (left) or R (right).
- Skip cut and paste. It overwrites the destination row instead of shifting it.
You're after a Google Sheets move row keyboard shortcut, and you'd probably like it to be one keystroke, the way Notion or VS Code let you slide a line with Alt + Up Arrow. Sheets doesn't work like that. Most forum threads either tell you to cut and paste, or say there's no keyboard method at all. Both are wrong. There is a keyboard route, and it has one trap in the middle that makes it look broken. Here are the exact keys, the mouse alternative, the column version, and a fallback that still works if Google rearranges the shortcuts.
How do you move a row in Google Sheets with the keyboard?
You press Shift + Space twice to select the whole row, then Alt + Shift + E, M, and K to move it up or J to move it down. That's the Windows and ChromeOS sequence, as documented in a Web Applications Stack Exchange thread on this exact question.
Here it is as steps:
- Click any cell in the row you want to move.
- Press Shift + Space twice. The first press selects only the cells in that row within your data. The second press stretches the selection across every column in the sheet.
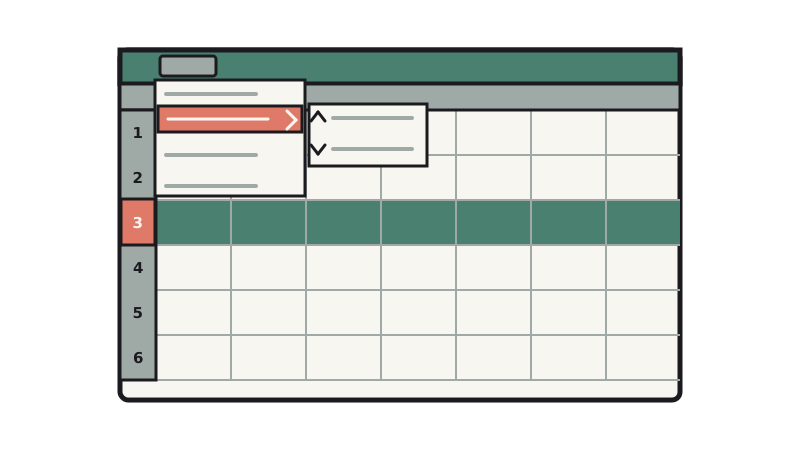
- Press Alt + Shift + E to open the Edit menu.
- Press M to open the Move submenu.
- Press K to move the row up, or J to move it down.
On a Mac, the Edit menu opens differently. You need to have Sheets keyboard shortcuts enabled, and then Control + Option + E opens Edit, after which you choose Move. You can also press Option + / to open the Tool Finder and search for the command by name. Both come from Google's own shortcut list.
You might wonder why Sheets doesn't just use Alt + Up Arrow and Alt + Down Arrow. Those two are already taken: Google reserves them for hopping between sheet tabs. So the row-moving commands live in the Edit menu, and the keyboard sequence is simply a way of driving that menu without the mouse.
Why is the Move option greyed out in Google Sheets?
The Move option is greyed out because you've only selected individual cells, not the entire row. Sheets only enables the Move commands when the full row (or column) is selected.
This is the trap. Press Shift + Space once and it feels like you've selected the row, because the cells in it light up. But that first press covers only the cells in the current data range. The second press is what expands the selection to the whole row. Skip it and the menu stays dead, so you'd be forgiven for deciding the shortcut doesn't exist.
The fix is easy to remember: if Move is grey, press Shift + Space once more. You can also click the grey row number on the left margin, which selects the whole row in one go.
The same page, Google's guide to adding or moving columns and cells, also gives you a fallback that doesn't depend on any letter keys. Open the Edit menu, choose Move, then pick Row up or Row down. If Google ever changes the keys after Alt + Shift + E, that menu path is the part to look for. On a Mac, the Tool Finder search for "Move" gets you to the same place.
How do you move a column left or right in Google Sheets?
You press Ctrl + Space twice to select the entire column, then Alt + Shift + E, M, and C to move it left or R to move it right. It mirrors the row routine, just with the column version of the selection shortcut.
The steps:
- Click any cell in the column.
- Press Ctrl + Space twice. As with rows, you need the second press to expand the selection to the full column.
- Press Alt + Shift + E, then M.
- Press C for column left, or R for column right.
Columns get skipped in most write-ups, which is odd, because it's the natural next question once someone has sorted out rows. The menu fallback is the same shape too: Edit, then Move, then Column left or Column right.
Here's the whole set side by side:
- Row up: Shift + Space twice, then Alt + Shift + E, M, K
- Row down: Shift + Space twice, then Alt + Shift + E, M, J
- Column left: Ctrl + Space twice, then Alt + Shift + E, M, C
- Column right: Ctrl + Space twice, then Alt + Shift + E, M, R
Select the whole row or column first (press Shift + Space or Ctrl + Space twice), then run Alt + Shift + E and M, and finish with the direction letter. If the letters ever change, Edit, then Move, is your fallback.
How do you move a row by dragging and dropping?
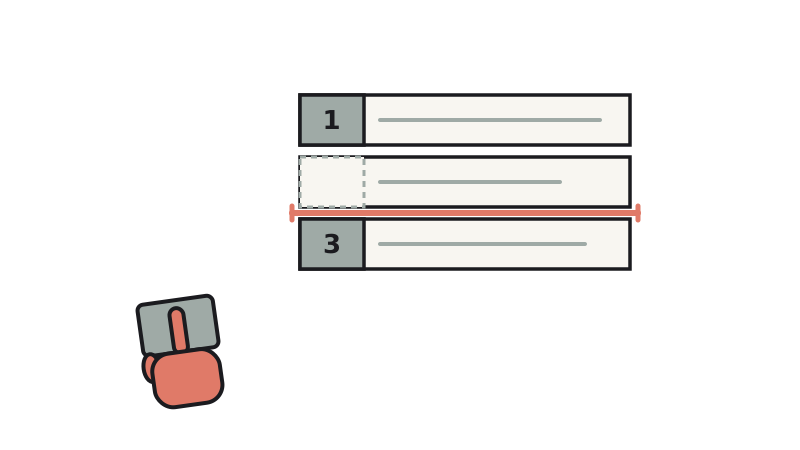
You click the grey row number to select the whole row, then drag that number up or down to where you want the row to land. It's slower than the keyboard, but you can see where the row ends up before you let go.
- Click the grey row number on the left margin. The whole row highlights.
- Hover over the row number until your cursor turns into a hand icon.
- Click and drag the header up or down. A line shows the destination.
- Release when the line sits where you want the row.
Columns work the same way. Click the column letter at the top, wait for the hand, and drag it left or right.
The common slip is grabbing a cell instead of the header. Cells show an open hand icon too, and dragging from there moves only that cell's contents, not the row. If one lonely cell is moving while the rest of the row stays put, you've grabbed the wrong thing. Let go, click the row number, and start again.
Why shouldn't you cut and paste to rearrange rows?
Cut and paste is a bad way to rearrange rows because Ctrl + X and Ctrl + V paste over the destination row instead of shifting the rows around it. Whatever was in that destination row gets overwritten, and the spot you cut from is left as an empty row.
Say you want your row 8 to sit above row 5. Cut row 8, paste it into row 5, and the old row 5 is simply gone. You've also got a blank gap at row 8 to clean up. Google's help page on moving cells describes this overwrite behaviour, and the notes behind this post flag a second risk: cutting and pasting can throw off relative formula ranges that pointed at the rows you shuffled.
Cut and paste does have one honest use, which is moving data into empty cells on purpose. For reordering rows in the middle of a list, the Move commands are the better habit. They shift the neighbouring rows to make room, and nothing gets overwritten.
- The reason this shortcut feels missing is the selection, not the menu: a single Shift + Space leaves Move greyed out.
- Alt + Up Arrow and Alt + Down Arrow belong to sheet tabs in Sheets, so don't expect them to move rows.
- Mac users open the Edit menu with Control + Option + E, or search for Move in the Tool Finder with Option + /.
- When dragging, grab the grey row number or column letter, never a cell, or only that cell's contents will move.
- Keep Edit, then Move, in mind as your fallback if Google changes any of the keys.
- google sheets
- keyboard shortcuts
- spreadsheets